| Difficulty Level | Estimated Cost | Duration for the Process |
|---|---|---|
| 7 out of 10 | $200-$400 | 2-4 hour |
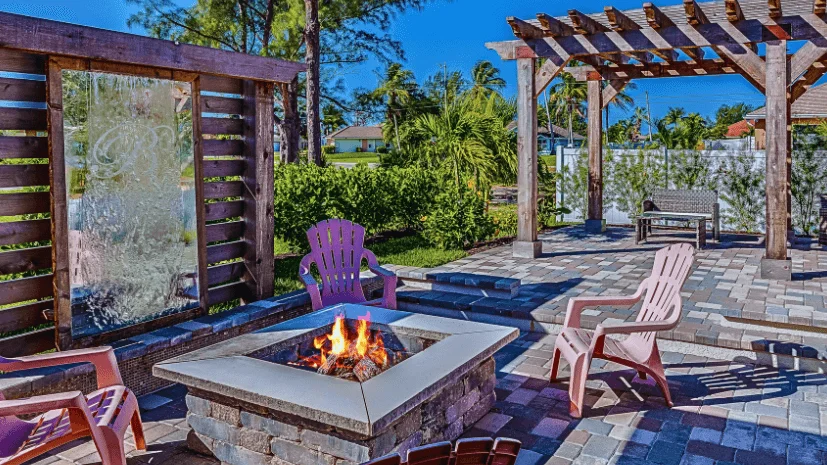
Are you looking to make a smokeless fire pit but don’t know where to start? For your backyard cookouts and fires in winter, glowing firepits create a welcoming spark. As we know, smoke hinders enjoyment. A DIY smokeless fire pit is the solution you need. As these outdoor fireplaces don’t produce the same amount of smoke as traditional ones, but they produce the same amount of warmth.
Without any hassle and smoke smell, A DIY smokeless fire pit reduces the imperceptible amount of smoke. In this article, you’ll find how to make DIY smoke-free fire pit in your backyard.
Why Do You Need a Smokeless Fire Pit
Making a smokeless firepit should be your first choice if you want to enjoy a campfire. To reduce smoke fire, these firepits use a special insert. You can enjoy an open fire longer without smoke through this smokeless firepit. It’s a great product for those sensitive to smoke and other pollutants. It’s easy to use, and wood in these smokeless firepits lasts many hours. Building a smokeless fire pit is easy now, but we’ll discuss later how to make a smokeless firepit.
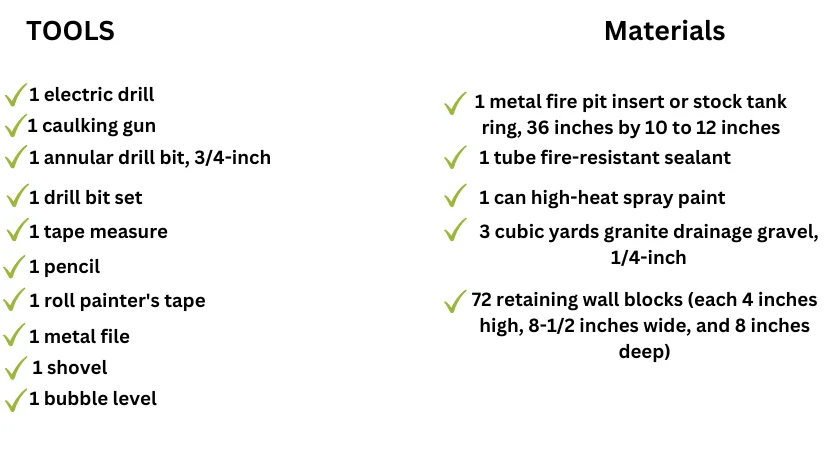
Items required for this project
Let’s gather the items which you need to build a smokeless fire pit. Before doing a further do, first of all, gather all your essential items so you’ll not need to find out any items once you start the product.
How to Build a DIY Smokeless Fire Pit
We know you’re anxiously waiting and want to learn how to build your own smokeless fire pit at home. To build a smokeless fire pit, ensure the area is flat and has low-hanging trees. Before purchasing any materials, always ensure to buy from reliable stores authorized by the manufacturing company.
So let’s start making your new smokeless fire pit for your backyard and throw a party.
1-Mark Hole On the Location
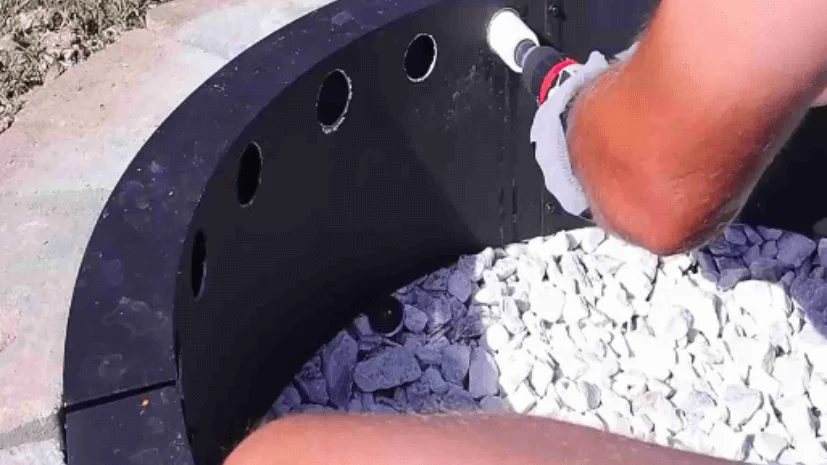
First of all, all you need to do On the top of the fire pit insert is indicate the location of the holes for air vents. You can use tape to mark down two inches.
Each hole should be two inches in distance from left to right. Use a pen or pencil and mark directly on the insert; you can also use tape to mark that area.
2-Drill Holes on Insert
Oxygen in the fire pit need to go somewhere; otherwise, it gets stuck in the fire pit if we don’t make holes.
On each marked location, drill holes in the insert by using a 1/4-inch drill bit. For drilling in metal, the drill bit should be appropriate. Drill holes in the insert at each marked location. For drilling in metal, the drill bit should be appropriate.
Make sure from the upper edge of the ring, drill roughly holes 1 to 3 inches using your drill bit. Leave approximately two inches of space between each hole as you proceed around the rim of the tank ring.
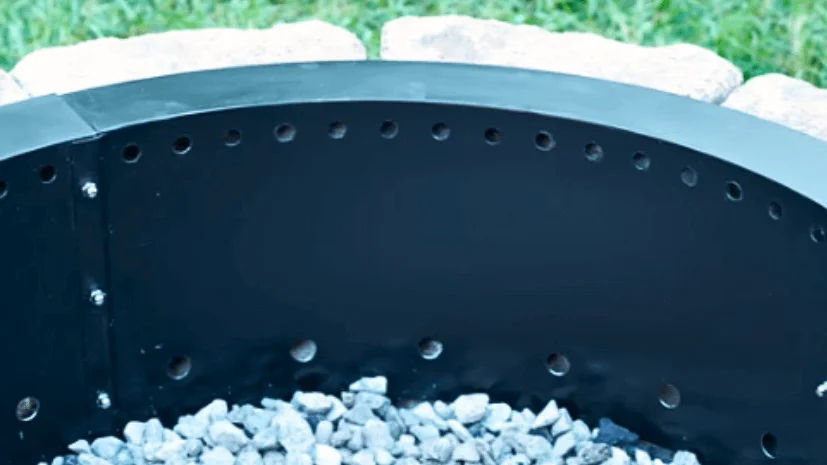
3-Enlarge Holes
Oxygen in the fire pit needs to go somewhere. Otherwise, it gets stuck in the fire pit if we don’t make holes.
To make a smokeless fire pit, create base openings for your stone fire pit. Add holes at the top and bottom of the fire pit ring. Build a fire after inserting the ring into the fire pit.
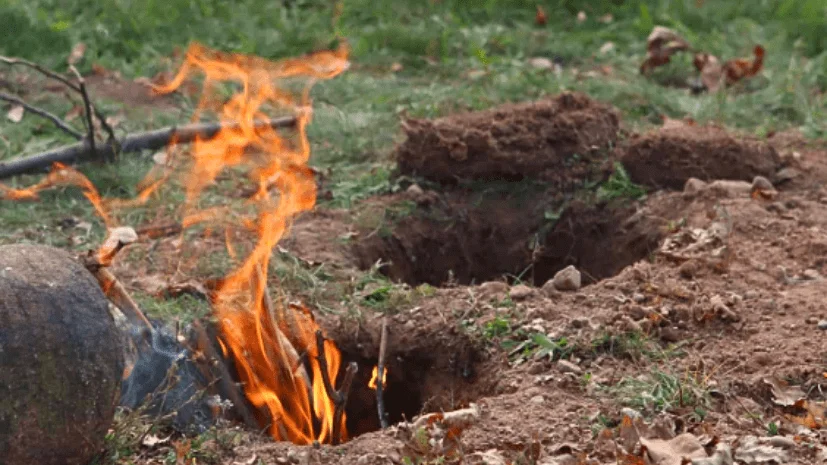
4- File the Holes
After digging twelve wide and twelve deep holes to build a smokeless fire pit Now, dig a tunnel about eight inches wide that leads out of the ground about one foot away; the fire will feed by air passing through the tunnel.
Keep the fire small and try to burn the dry wood.
5- Crack Sealing
The next step is to seal the cracks using a fireproof sealant. However, the metal stock tank ring eliminates the need for this step.
To utilize your smokeless firepit for many seasons, you need to seal your firepit properly, prepping, repairing, cleaning, and then applying a concrete sealer.
6- Painting
With high-heat spray paint, spray the inside and outside of the firepit. Make sure to dry the first coat and then apply the second.
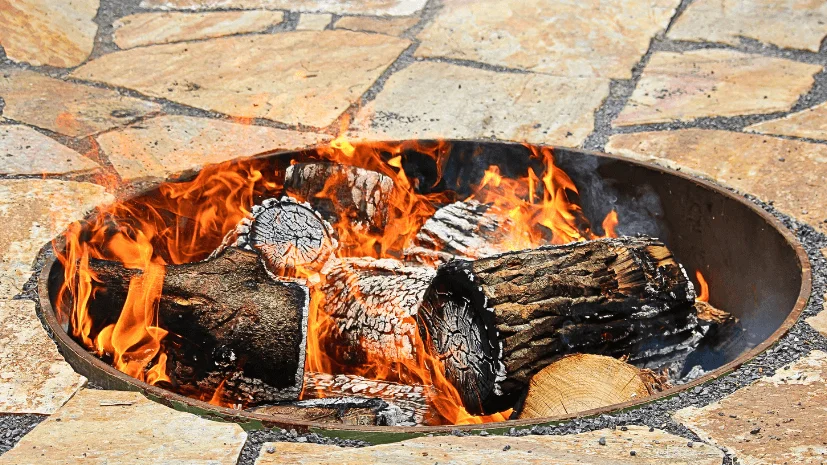
When you build your smokeless fire pit, smoke can be re-burned in a secondary combustion stage. Because if the fire gets hotter, it also burns off the smoke. Metal inserts and masonry paves are the ones that use a smokeless fire pit.
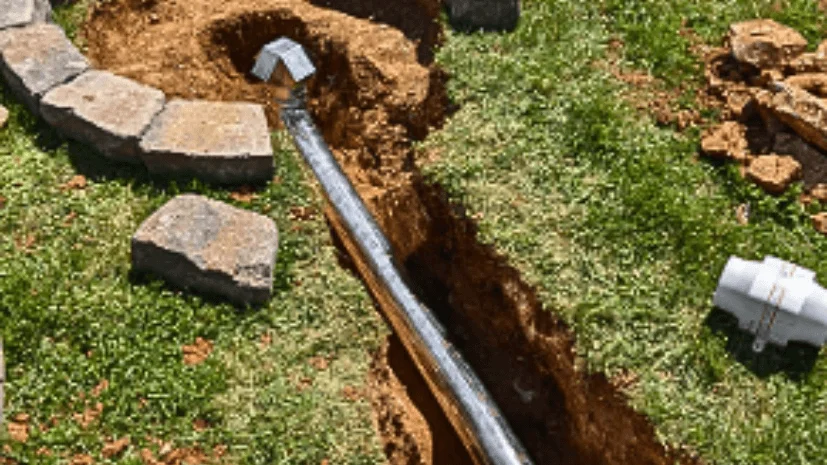
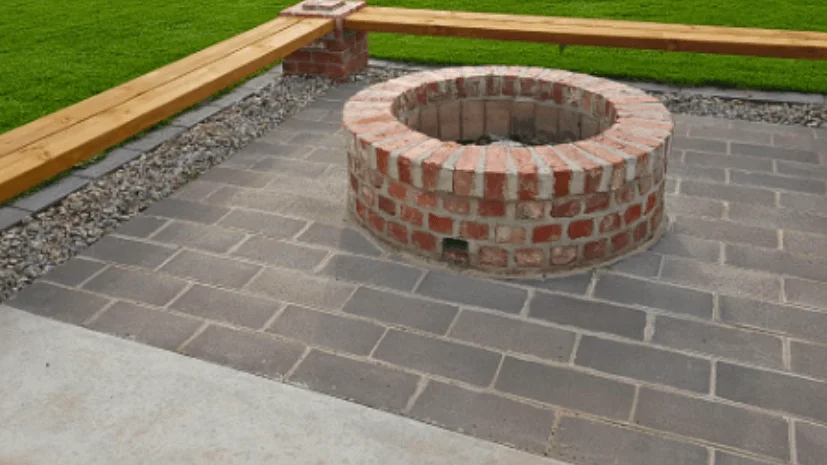
7-Preparing Firepit Base
Remove the turf by digging out the 60 inches diameter circle 2 inches deep with the bubble level check for its level. With the one-fourth-inch drainage, gravel fills out the space.
Remove the turf by digging out the 60 inches diameter circle 2 inches deep. With the bubble level, check for its level.
Furthermore, excavating a tunnel about a foot wide at the bottom of the pit and exiting it about a foot away. Fire feeds the air in the tunnel. The purpose of keeping small smokeless fire pits is to ensure that the wood burns well for several seasons without accumulating debris.
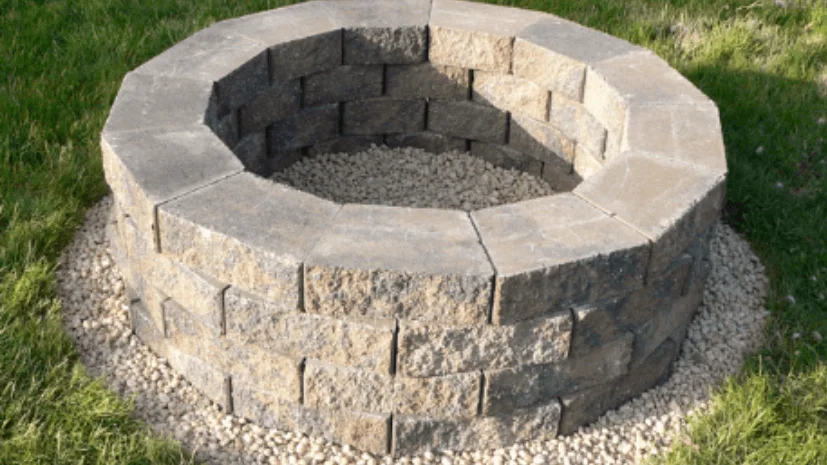
8- Establish the first tier of pavers
On the ready-to-use gravel base, place the insert. Around the insert, build the first paver tier stones on all sides and maintain a gap of 2 inches.
To feed air to the main fire, take out four blocks at the bottom tier of the opposite end. After removing the insert, set it aside.
9-Finish Paver Tiers
Adding three more tiers will allow you to build upward. Apply landscape block adhesive to the blocks. Make sure the blocks are staggered. Pour a generous amount of crushed gravel or paver base into the holes then your holes will be approximately 5 inches thick.
But if you’re using river rock at the bottom of the pit, it’ll prevent weed growth and help with drainage.
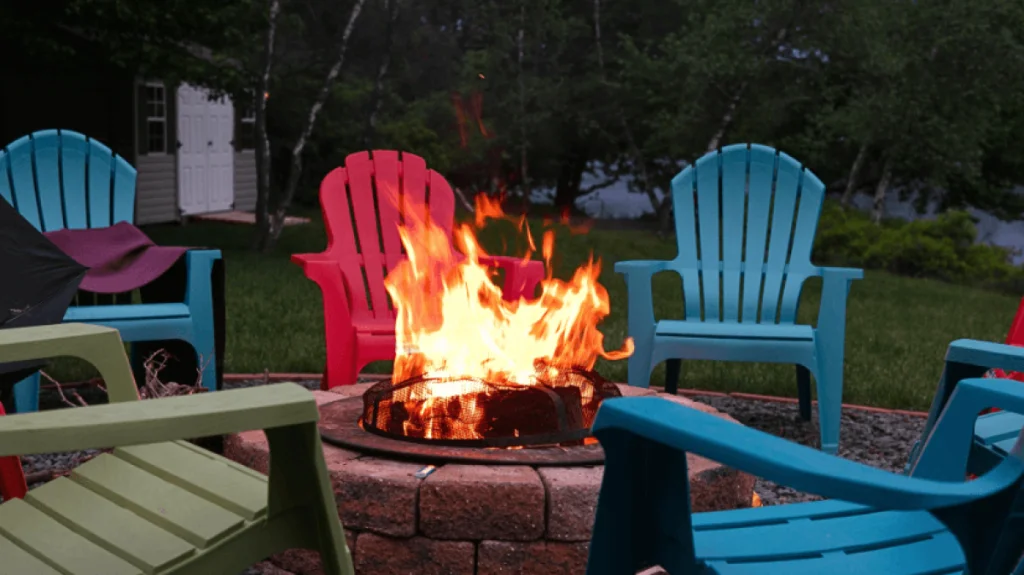
10-Creating Seating Area
Adding foldable camping chair or resin chairs are maintenance-free. Their outdoor blankets and pillows make it comfortable and cozy for your guest and family. Ensure your seating area is large enough for your guests to sit in comfort while maintaining a safe distance from the fire pit.
Maintaining at least 7 feet from the fire pit’s edge is a good rule of thumb. So this will allow you ample legroom and help you keep a safe distance from the heat.
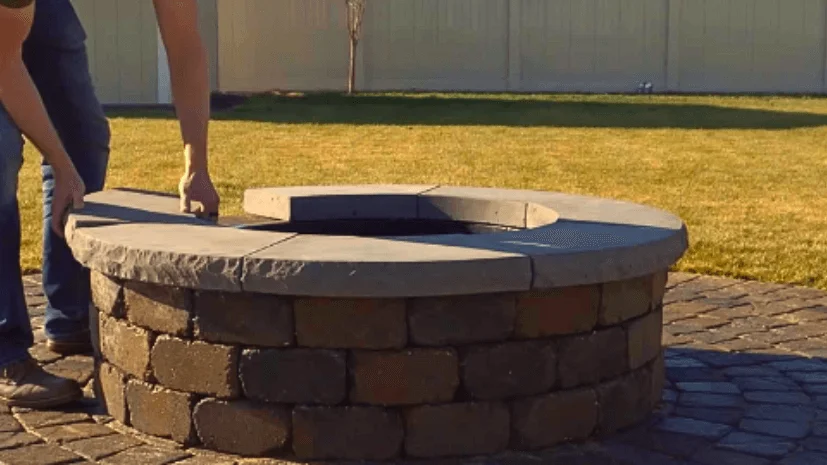
11- Adding DIY Smokeless Fire Pit Insert
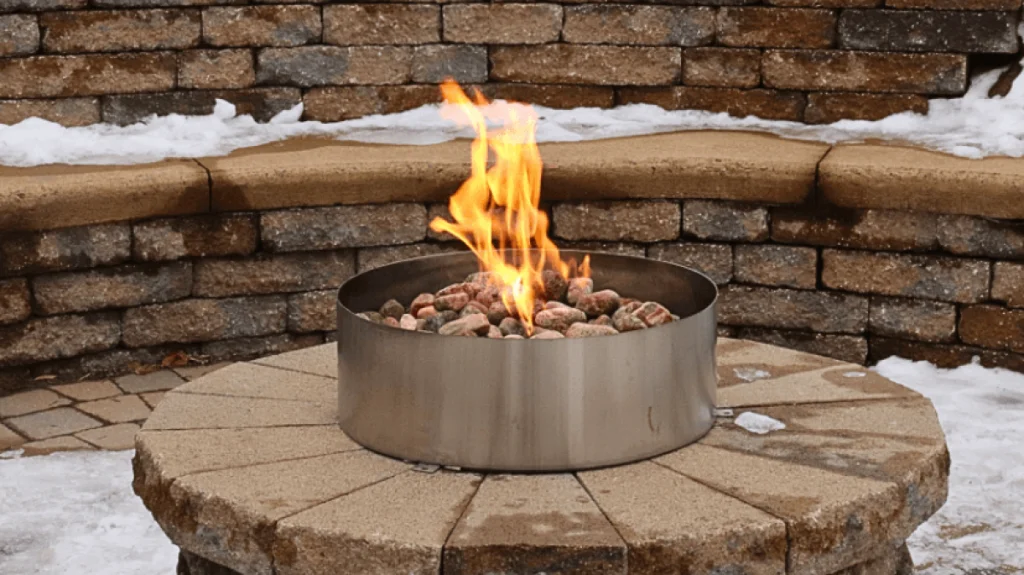
A smokeless fire pit consists of an outer wall constructed of masonry pavers and an inner wall made of a metal ring, either a stock tank or a fire pit ring. A top lip on the fire pit ring permits the ring to rest on top of the pavers.
Heat-resistant paint is applied to the fire pit ring. On the top tier of the blocks, set the fire from above.
12-Test Your Own Building Smokeless Fire Pit
Now; the fun part is to begin; after building your first DIY smokeless fire pit, it’s time to test it.
To feed the fire:
● Use dry wood continuously.
● Burn the fire for at least 30 min and watch for a smoke reduction.
● For secondary combustion to occur, ensure the fire is very hot, like 550 to 700F.
After this, you’ll notice the smoke has gone! But what do you think about the second combustion? So what will you do about it? Will you need a flame to shoot out of your smokeless fire pit? Yes, of course, you’ve to keep adding the dry wood to the fire; it’ll eventually shoot the flames out of the holes.
How Does a Smokeless Fire Pit Work
Usually, the question that arises in your mind is how the smokeless fire pit works. Smokeless fire pits have a very small amount of smoke due to their double and secondary walls, which prevent heat from escaping. Through a secondary combustion system, wood or charcoal burns to ash by eliminating any remaining smoke particles. This smokeless fire pit works safely without producing any smelly, uncomfortable material. But all of it depends on the model you’re using; however, it may be wood, logs, charcoal, and pellets. We suggest you use propane fire pits as they’re completely smoke-free.
To ensure safety, these smokeless fire pits need ventilation. You can use them on your patio; ideally, they’re made from non-combustible materials. Some important things should be considered while using a DIY smokeless fire pit; never try to place a firepit under branches, on slopes, or on trees. Keep a fire extinguisher and first aid kit in your hands for emergencies.
Tips To Reduce Smoke
After learning how to make a smokeless fire pit, Remember some important points to produce less smoke:
● After every burn, dump out the ash from your smokeless fire pit.
● Use small Wood pieces
● Don’t use chemical-treated charcoal or low-quality wood. Best dry woods doesn’t produce smoke, so try to utilize them.
● Avoid letting your firewood rest on the flame ring or above the secondary burn holes.
● Use firepit tools if your fire starts to die; it’ll help you to mix up the wood to oxygen the fire.
FAQ About DIY Smokeless Fire Pit
1. Do smokeless fire pits burn wood faster?
Burning wood in a smokeless fire pit is more efficient and faster than a conventional fire pit. Furthermore, the wood will burn more efficiently, giving off more heat. You should also avoid overfilling the fire pit. Fire pits should have a line of holes around the top where the wood should be kept.
2. Do smokeless fire pits give off good heat?
While smokeless fire pits do not emit smoke, they do emit heat. As with a traditional fire pit, this fire offers both benefits and dangers. S’mores, Hot dogs, and warming your hands are all possible.
3. Are smokeless fire pits safer?
It is safer to use them! It is safer to use smokeless fire pits rather than traditional fire pits since they do not produce smoke.
4. What do you put in the bottom of a homemade fire pit?
You can use sand in your firepit to protect the bottom from burning or charring over time by acting as a buffer between the wood or fuel you use. In addition to absorbing heat, sand also helps to redistribute it in an equal manner.
Conclusion
We hope you learned much about building your smokeless fire pit from your guide. By following our guide and understanding the important facts, you can easily construct your smokeless fire pit. But before building, remember all the precautions and important points and ensure you’ve all the essential items on your table. However, buying a fire pit from a store is cheaper than building one.
You can browse VEVOR to find anything; even you can purchase a Smokeless fire pit stove for your backyard at a discounted price, so do not hesitate to place your order. Enjoy the outdoor weather by making a smokeless fire pit and make your weekend memorable with your family and friends.