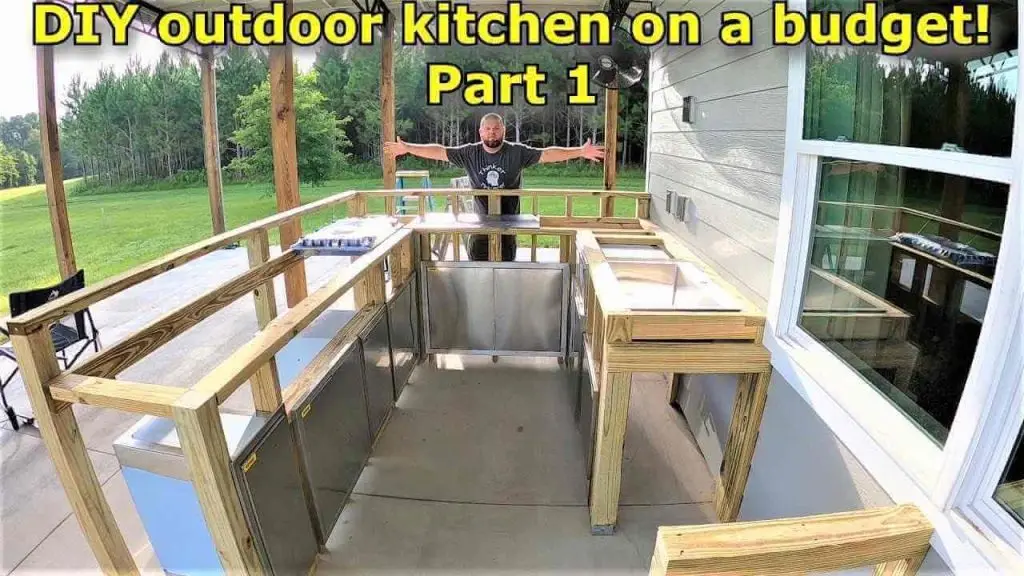
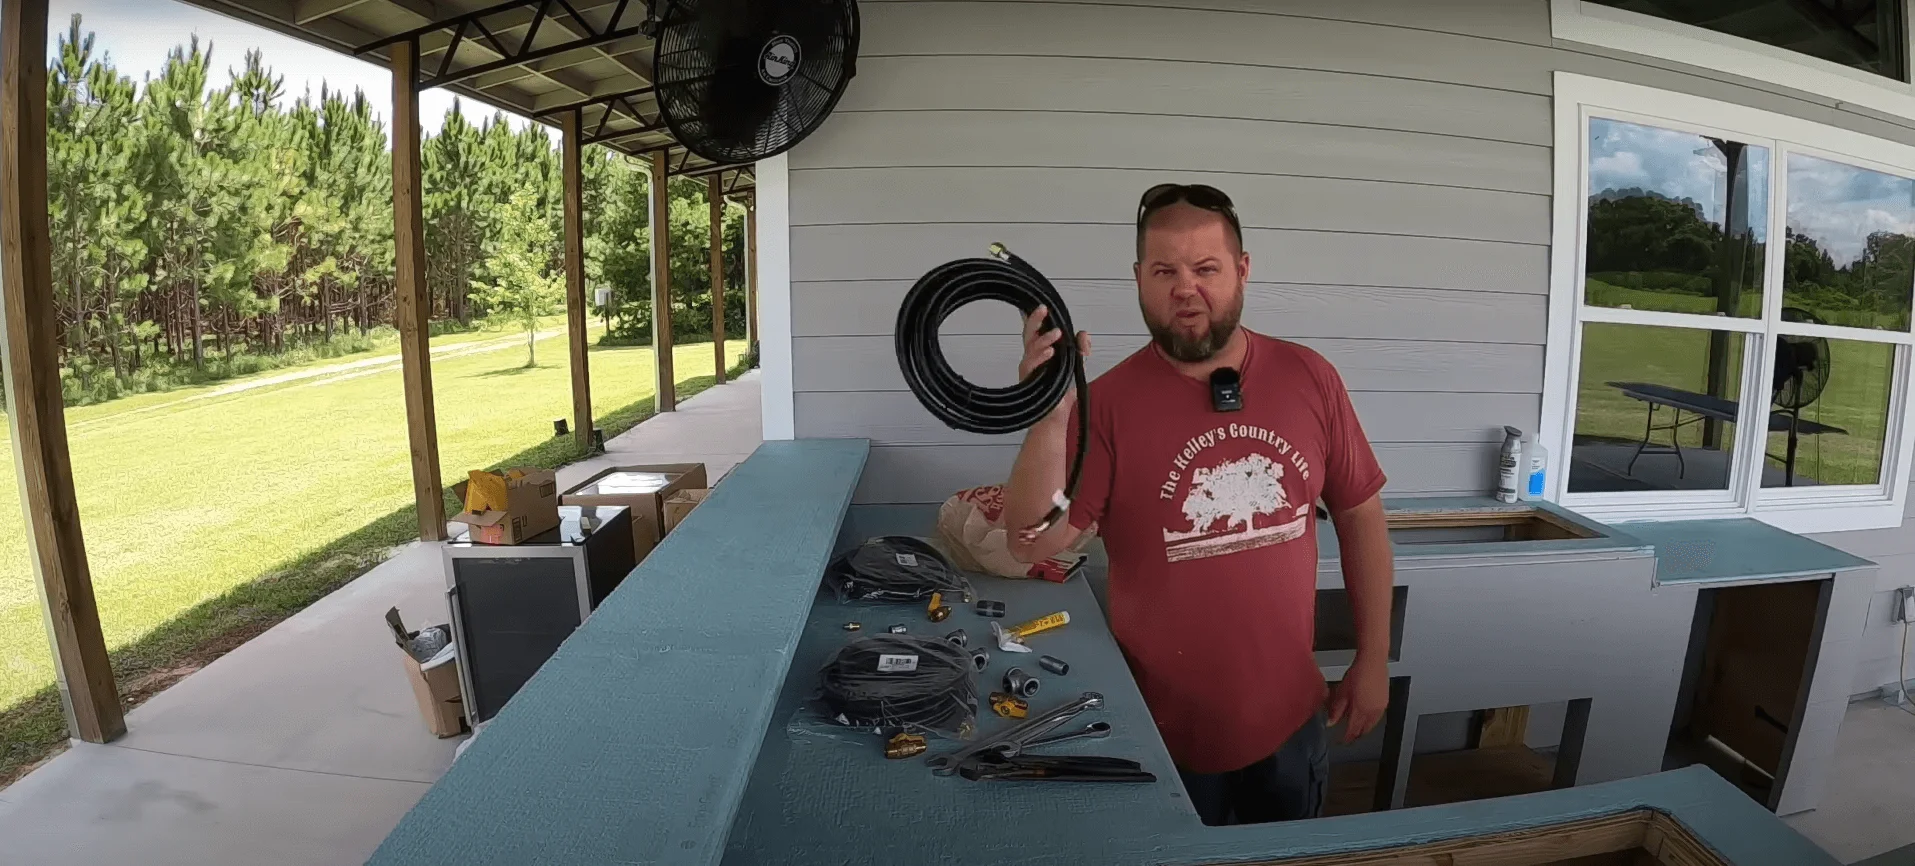
Part 1: The DIY outdoor kitchen build has started. In this episode I frame the outdoor kitchen and setup the doors, drawers and more in the layout.
Part 2: the DIY budget outdoor kitchen build, I also build an area for the Blackstone in this episode.
Part 3:The DIY budget outdoor kitchen gets electrical, cement board and a special fire proof coating in this episode.
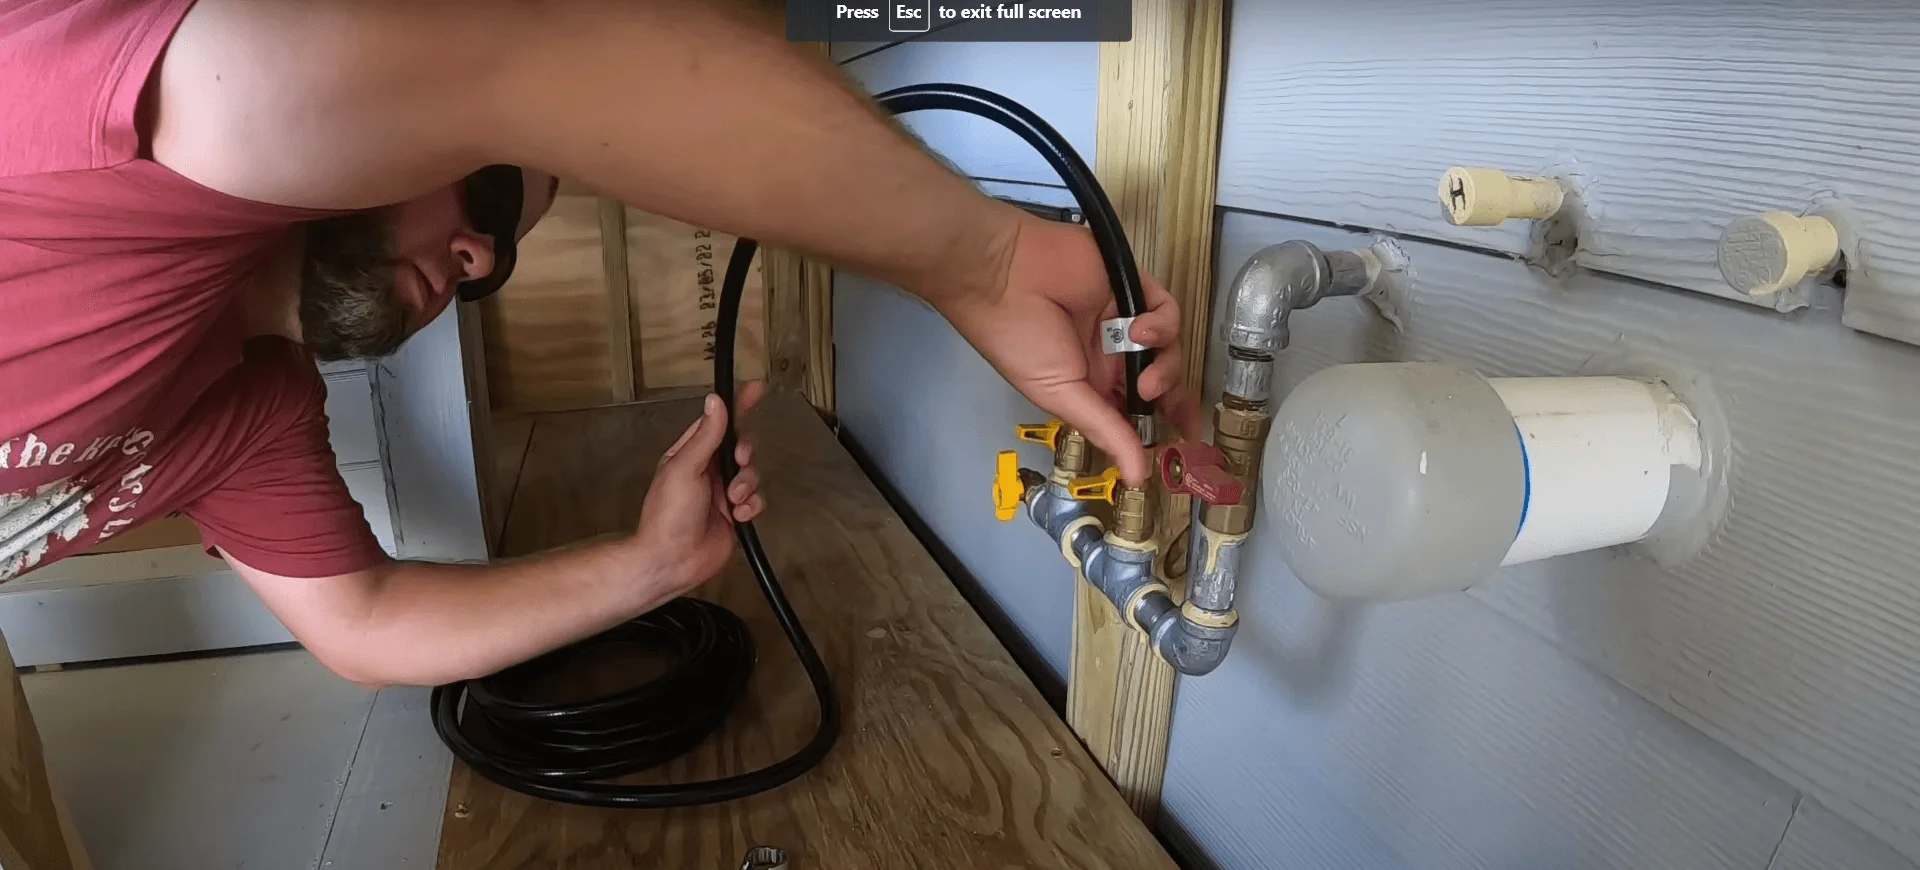
Part 4: The DIY budget outdoor kitchen build reaches closer to completion in this episode. I finish the tile backer board, waterproof the countertop, paint, trim and install gas plumbing in this episode.
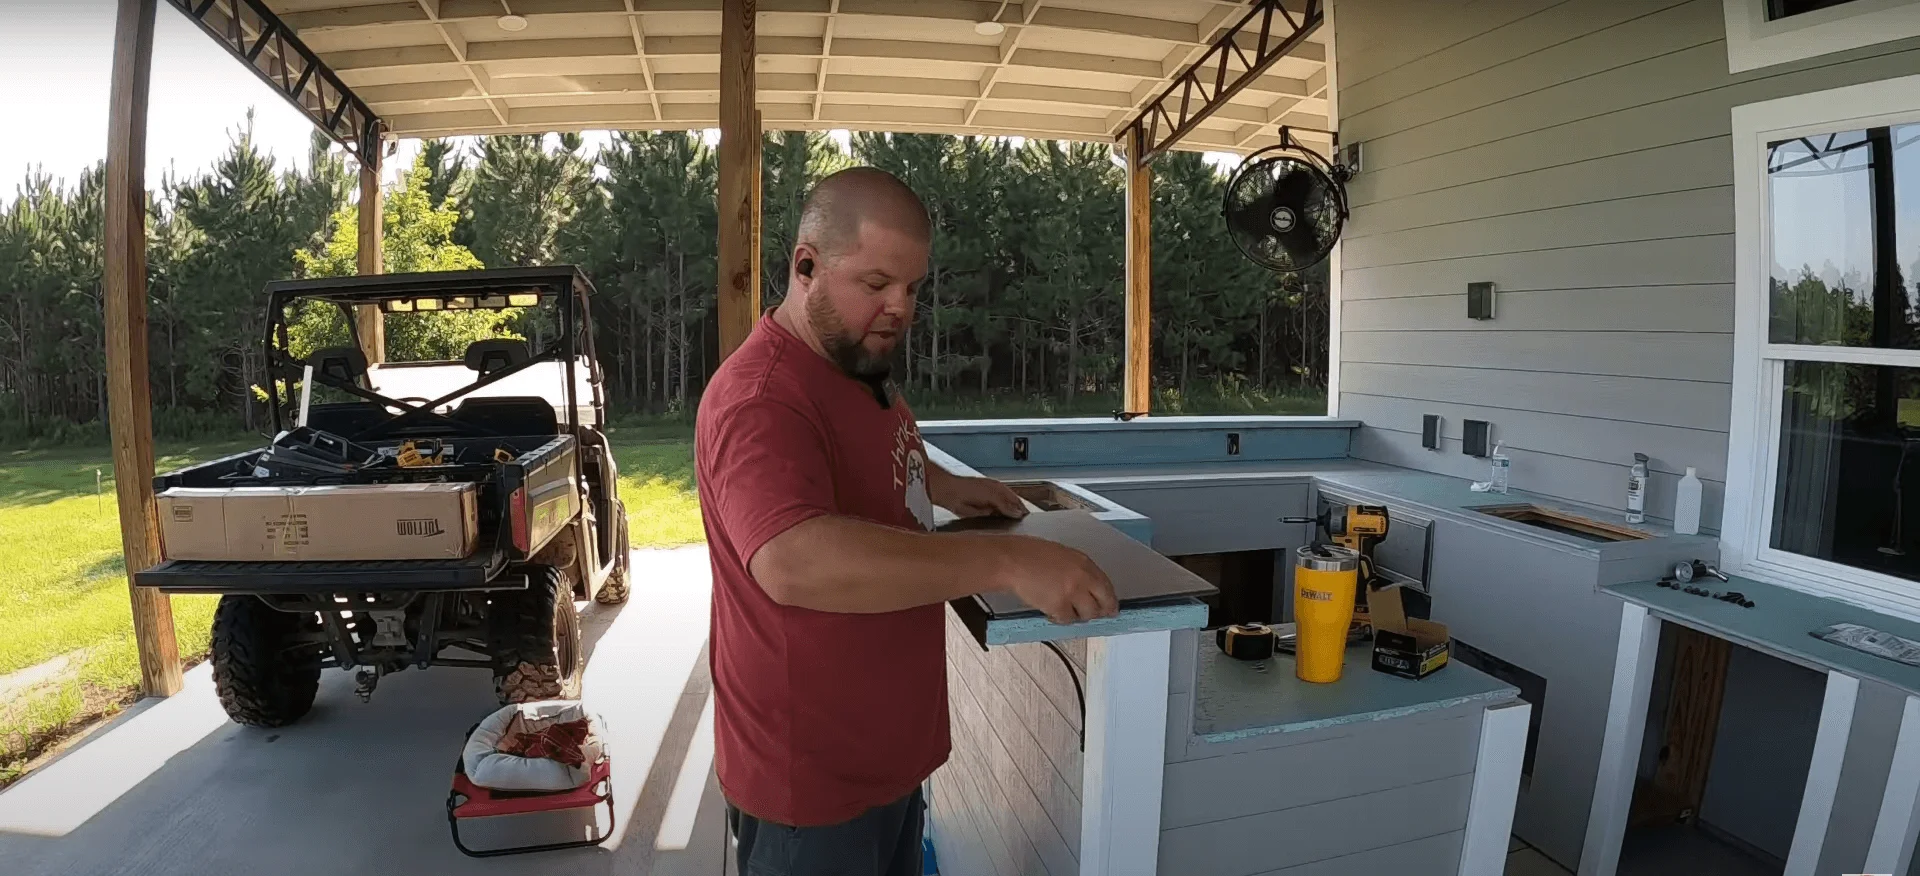
Part 5: The DIY budget outdoor kitchen gets tile countertops in this episode. I also take time to answer some of the most popular questions I’ve been asked during this series
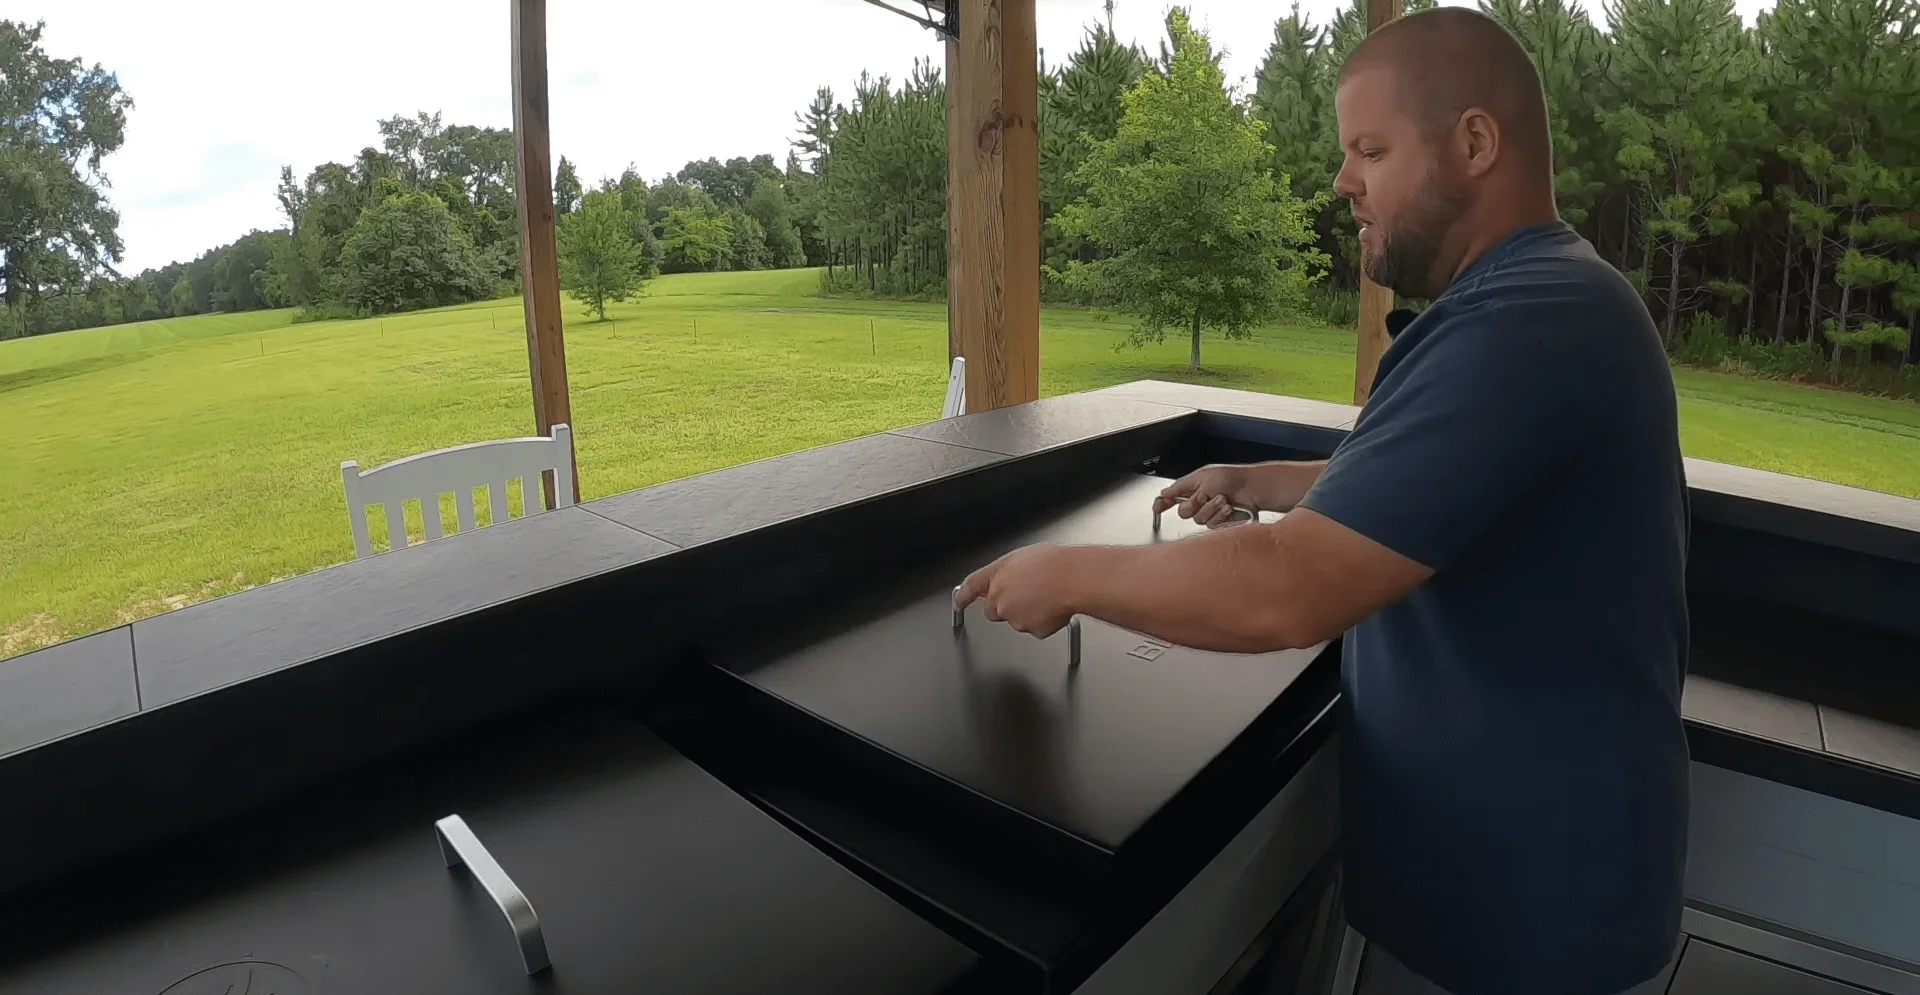
Part 6: The DIY budget outdoor kitchen build really takes shape in this episode. I install the Blackstone, sink, cook top, drawers and doors in this episode.
| Difficulty Level | Estimated Cost | Duration |
|---|---|---|
| 8 out of 10 | $3000 – 6000 | 1 Week |
Many of us strongly desire to create a functional, beautiful, and stylish place to live. DIY projects offer you the chance to utilize your creativity and put it to the test. From small handmade crafts to large construction projects, the possibilities are endless.
An engaging and creative idea you can try is a DIY outdoor kitchen built to enhance the beauty of your place and provide a sense of accomplishment for the house. Building your very own small U-shaped outdoor kitchen on a limited budget can be an experience that is both pleasing and enjoyable. And guess what? You don’t even have to compromise on the level of quality! This is where the VEVOR system comes into play.
They are your one-stop shop for acquiring all of the equipment and components that you need to have in order to make your do-it-yourself outdoor kitchen a reality without breaking the bank. In this article, we will walk you through the process of making your very own outdoor kitchen that is kind to your wallet by using the wonderful products that VEVOR has to offer.
Steps for Building a DIY Outdoor Kitchen
You can make your DIY outdoor kitchen build journey fun with the right tools and materials. Let’s check out the step-by-step process of building DIY U-shaped outdoor kitchens.
Materials You Need for this Project
For building a DIY U shape outdoor kitchen, you will need a variety of materials, tools, and equipment. VEVOR has all the necessary items for this project. Now, check out the list of what you might need from them:
Materials for Building the Outdoor U-shaped Kitchen
● Steel studs
● Screws
● Cement backer board
● Countertop material
● Fireproof material
● Weather-resistant kitchen appliances for storage
Tools and Equipment
● Tile cutter
● Level
● Measurement tape
● Power drill
● Saw
● Trowel
Kitchen Appliances and Fixtures
● Grill or griddle
● Sink
● Faucet
● Lighting fixtures
● Outlets
For Plumbing and Electrical Needs
● Electrical wires
● PVC pipes
● Outlets to protect against electrical shocks
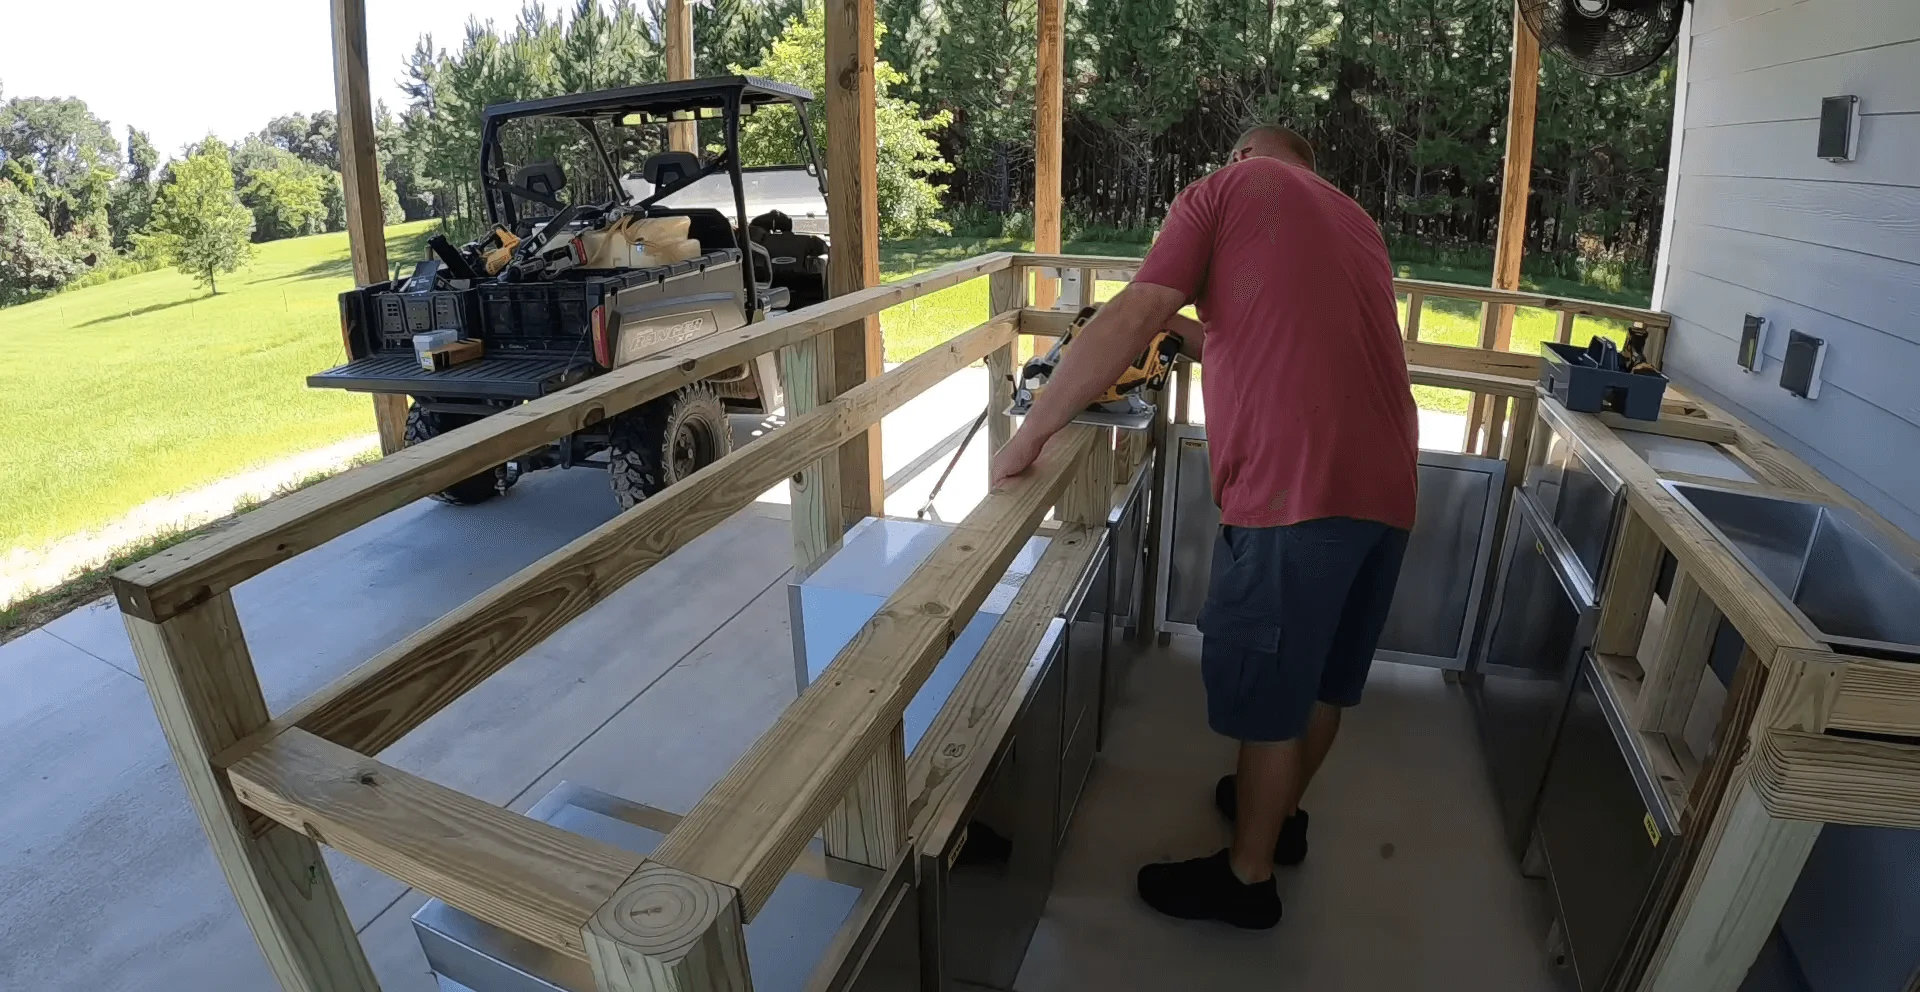
Step 1: Framing the Layout
Always remember that safety should be your first priority. You must wear safety precautions before starting the project. Keep all the tools and materials readily available within your reach. Then, the first thing you need to do is to visualize the design before you start the construction process.
The use of grid paper as a planning and framing technique for the U shaped outdoor kitchen layout could prove a useful tool. It makes it easy for you to view and sketch out the proportions and location of the different pieces.

Step 2: Building the Blackstone Area
In the second step, you need to measure the Blackstone griddle for the appropriate space in your outdoor kitchen layout. It is better to include extra space for future cleaning and maintenance.
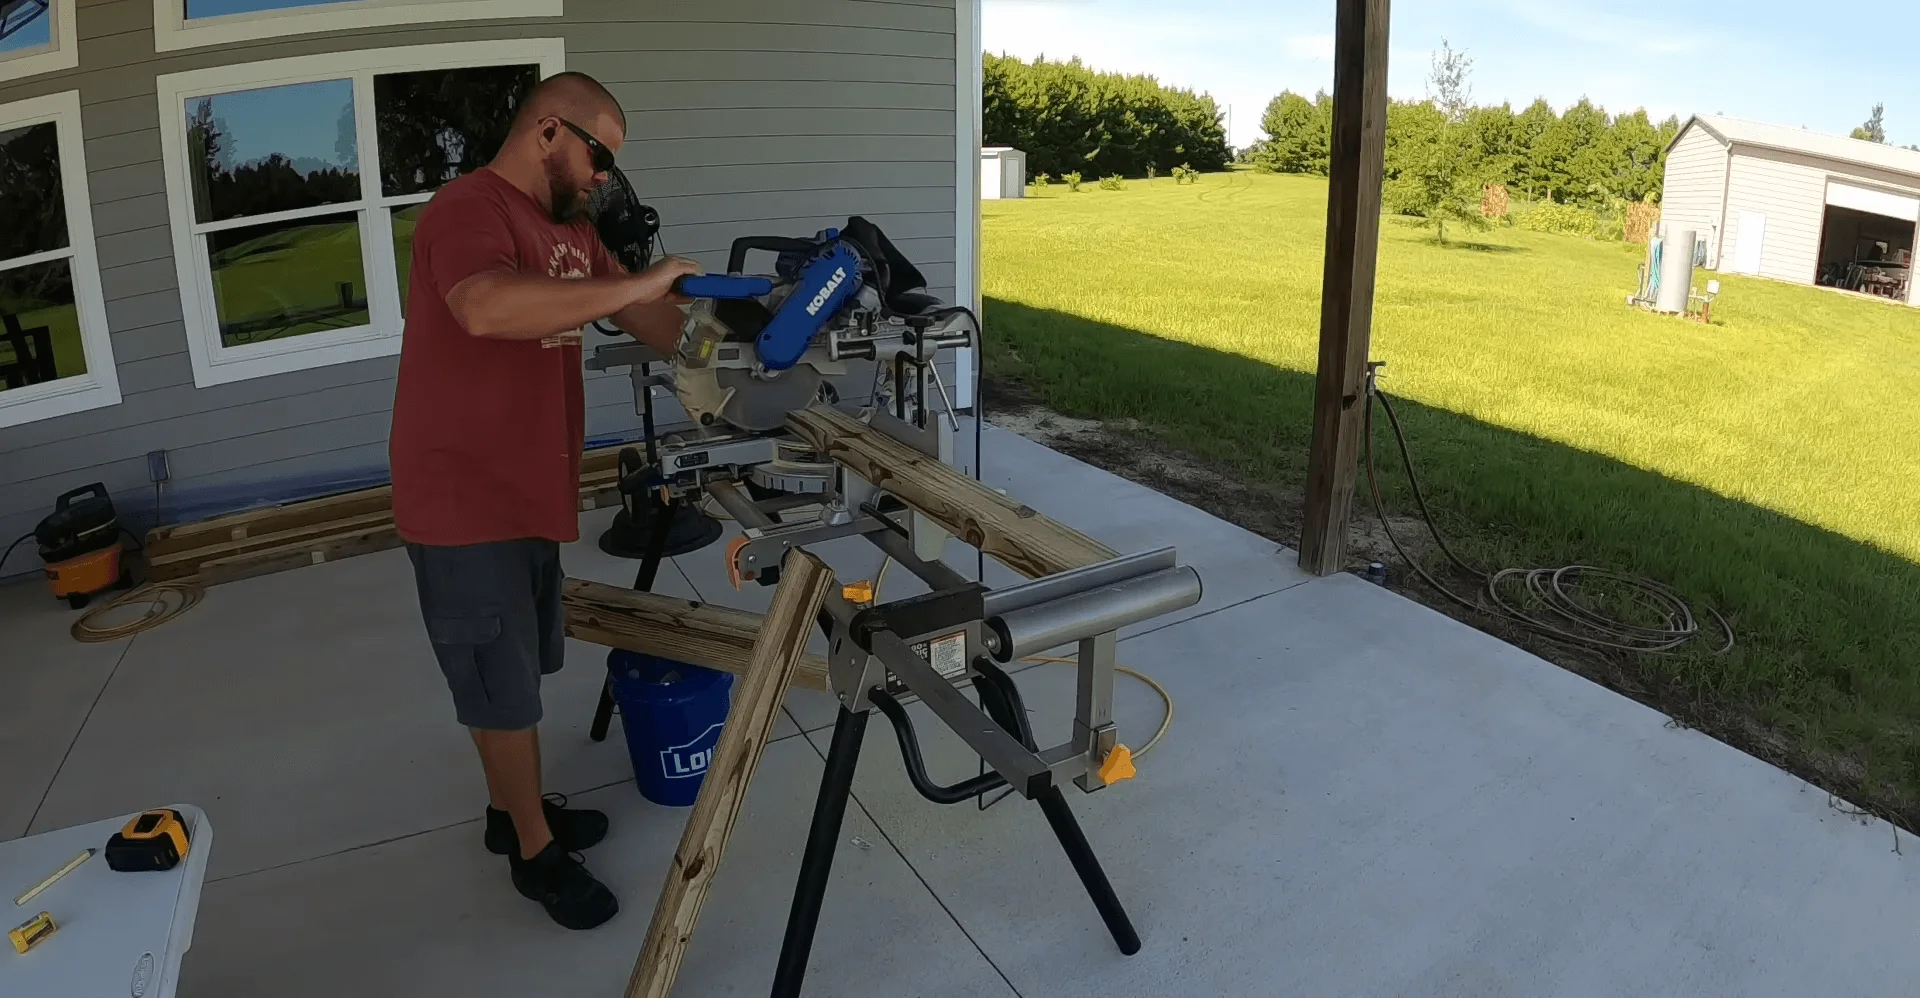
After designing U-shaped outdoor kitchen dimensions and measuring the Blackstone griddle, it’s time to construct the grill station’s frame with water-resistant materials like treated wood or metal studs. The materials must be sturdy enough to give proper support to the structure. You can consider adding a grill mat or other heat barrier to protect the structure from excessive heat and potential damage.
If possible, install a vent hood above the Blackstone griddle to manage smoke and airflow. It will help you to get an enjoyable cooking environment. Building the base structure of your kitchen with plywood will be appealing for your DIY outdoor project. Cut out the required pieces and join them together with VEVOR screws and a cordless drill. Make sure the structure is sturdy and secure.
Step 3: Electrical, Cement Board, and Fireproof Coating
After building the Blackstone area, it’s time to plan for your electrical needs first, which may include outlets for your outdoor kitchen appliances, lighting, or other systems. You can always hire a professional electrician to ensure proper safety and code compliance.
Choose outlets that are rated for outdoor use that are built to endure the effects of moisture, rain, and other weather conditions common in the great outdoors. These outlets are constructed with long-lasting materials and are equipped with gaskets or caps to prevent water from entering them.
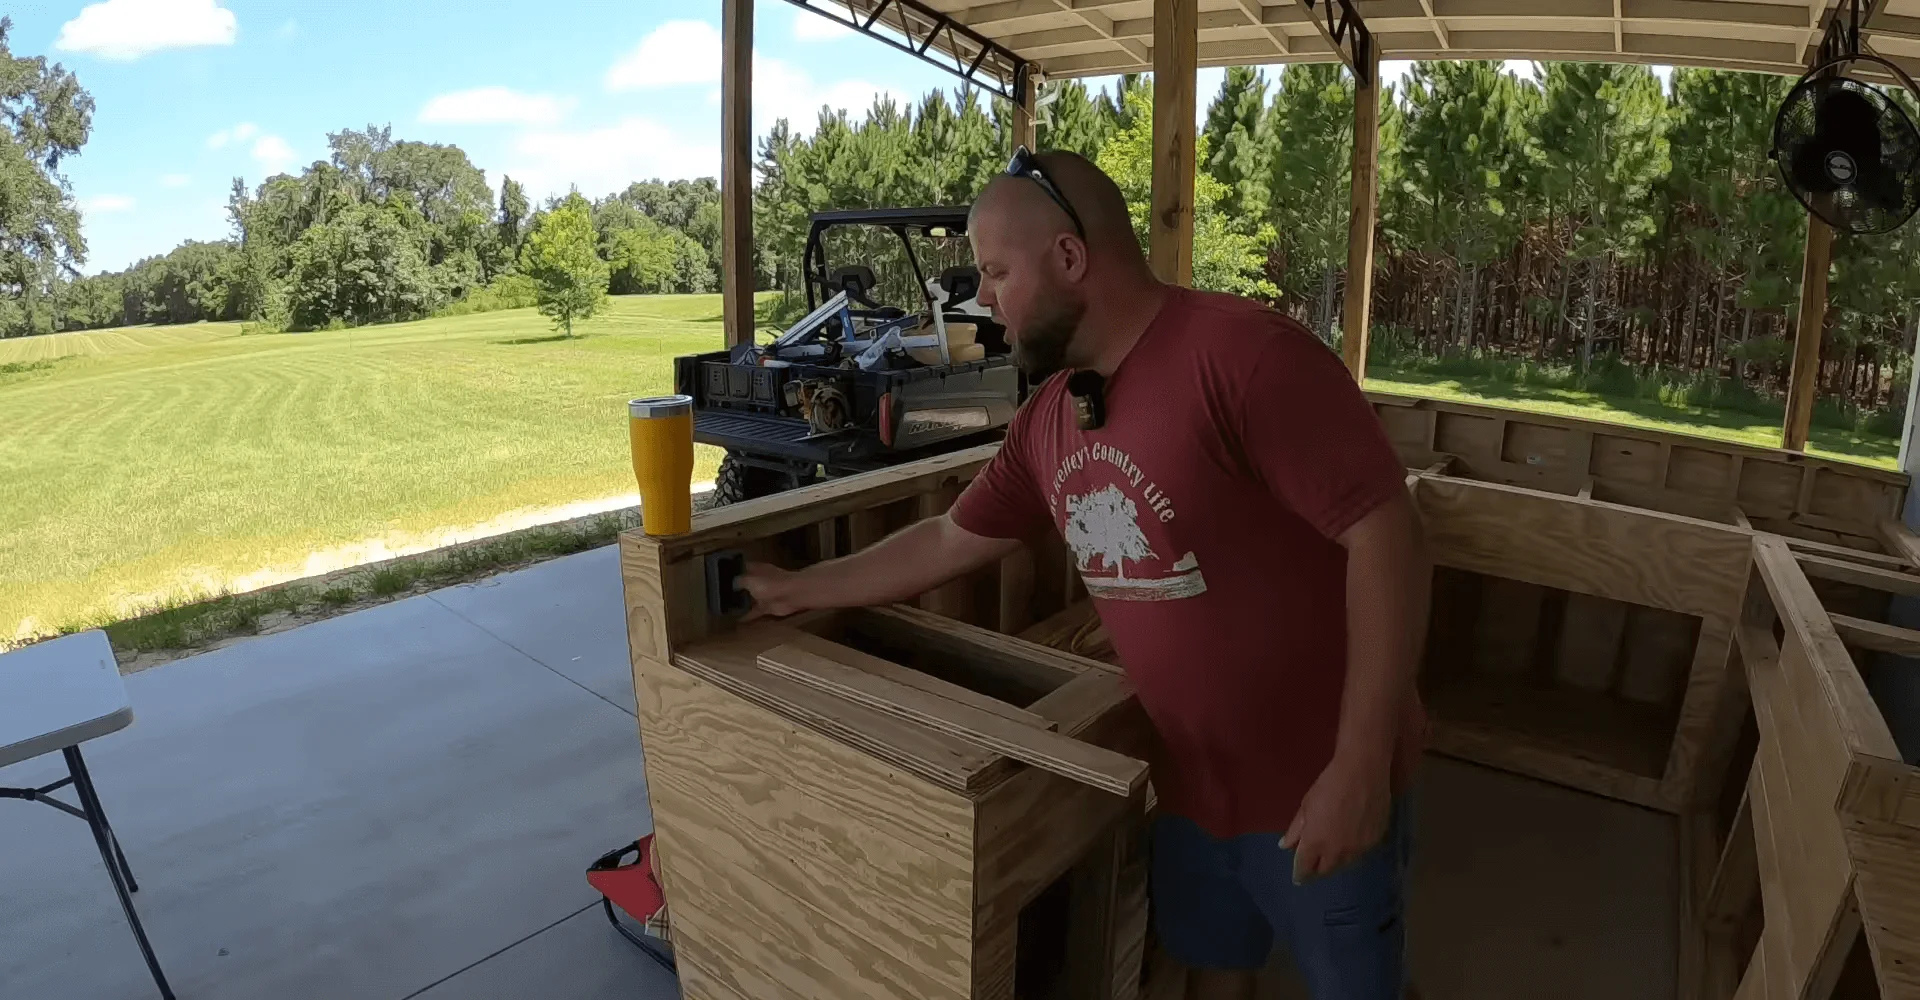
Once your frame is built, cover it with cement backer board. Cut the board and attach it to the frame with backer board screws. You should also remember that fireproofing is needed for safety. So, install a heat barrier under your cooking appliances. Some fireproof materials for construction near the heat source will be a great help. If you have a wooden frame, consider a fire-retardant coating as well.
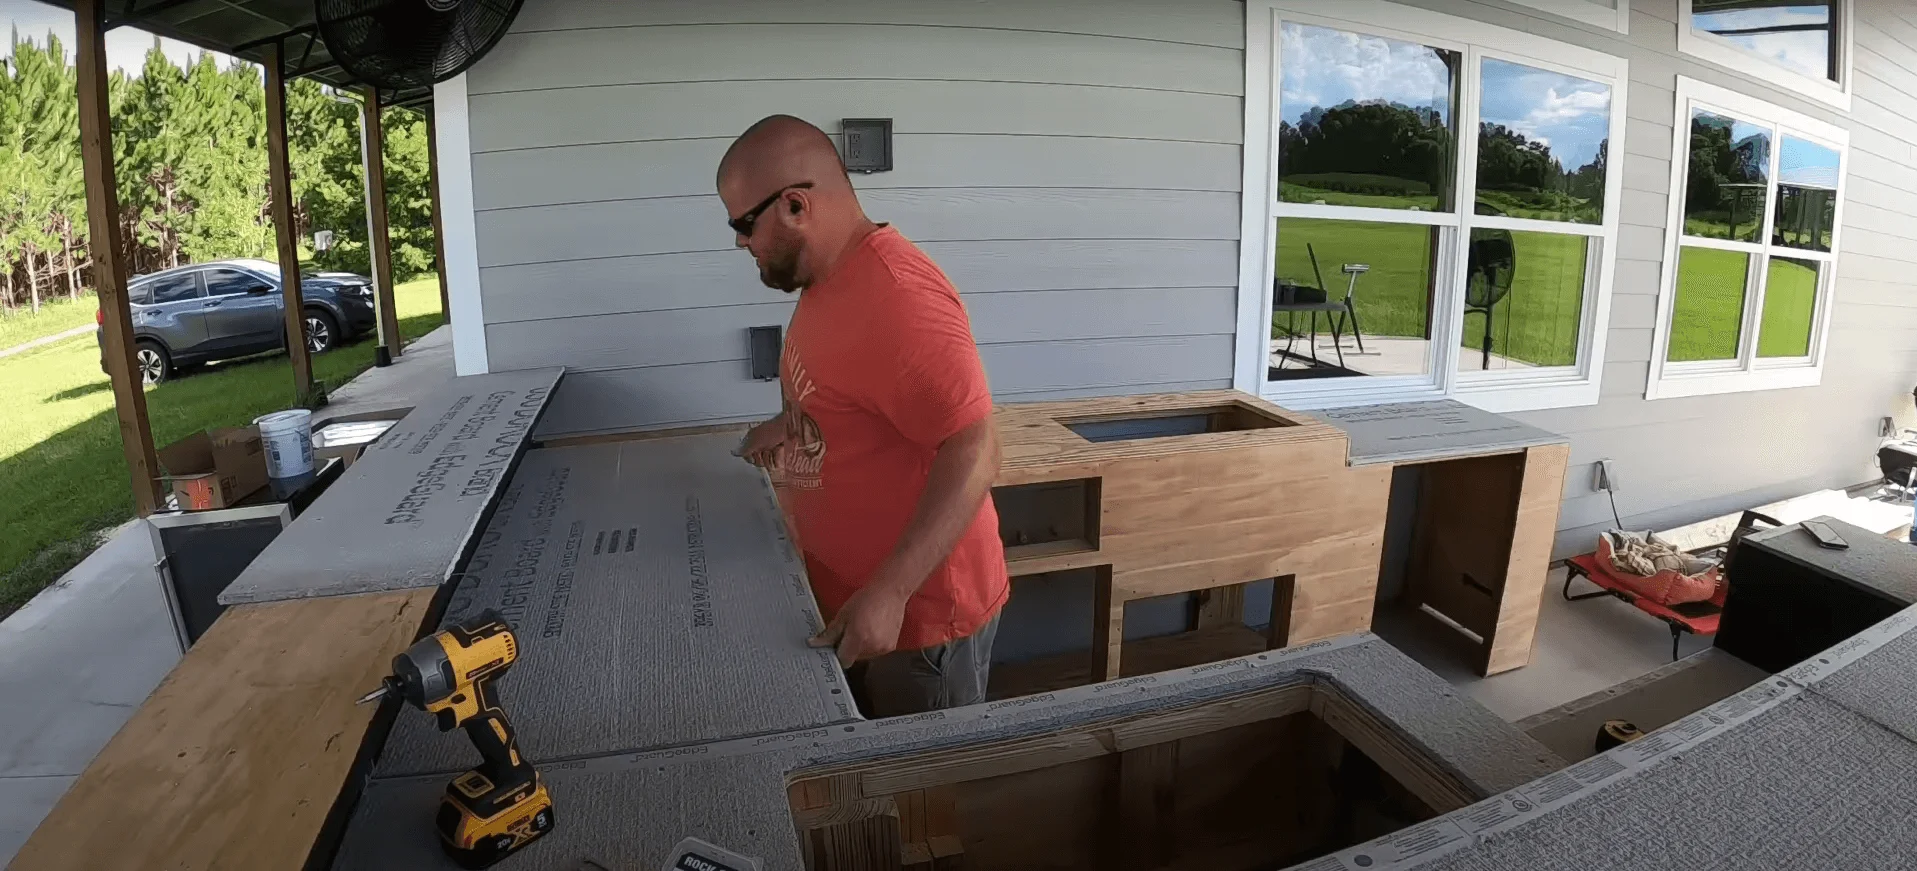
Step 4: Finishing Touches and Plumbing
You can start the step by painting or staining the exposed wood and Seal it properly for outdoor protection. Attach any hardware like handles or pulls through some kitchen appliances to make your work easier in the kitchen.
You can install lighting fixtures for evening use as well. If you are planning to include a sink in your outdoor U-shaped kitchen, consider the process of running a water supply line and drainage line. Hiring a licensed plumber is better because this process involves extensive experience and knowledge.
However, if you know the basic plumbing process, you can always do it yourself. Connect the cold water line to the sink. The water heater or tankless heater should be installed if you want a hot water supply in your outdoor kitchen.
Step 5: Tile Countertops
The DIY outdoor kitchen build project gets the tile countertop in this step. Before laying out the tile edge, you need to give the countertop some shell support. Get the bar top exactly at the place it needs to be before cowling because you cannot flex or move the top once the thin set is set up. Choose a tile with a newly painted trim edge, as it has holes and ridges in it. Now, put down the thin set and press this on the trim edge.
Step 6: Final Installation and Completion
Your DIY budget outdoor kitchen has already taken on a pleasing shape. In this step of your U-shaped outdoor kitchen plans, you need to install a sink, cooktop, trash pull-out, Blackstone, stainless drawer sets, doors, etc. Following the curing of the grout and setting of the countertop, you need to install these outdoor kitchen appliances as per the manufacturers’ instructions.
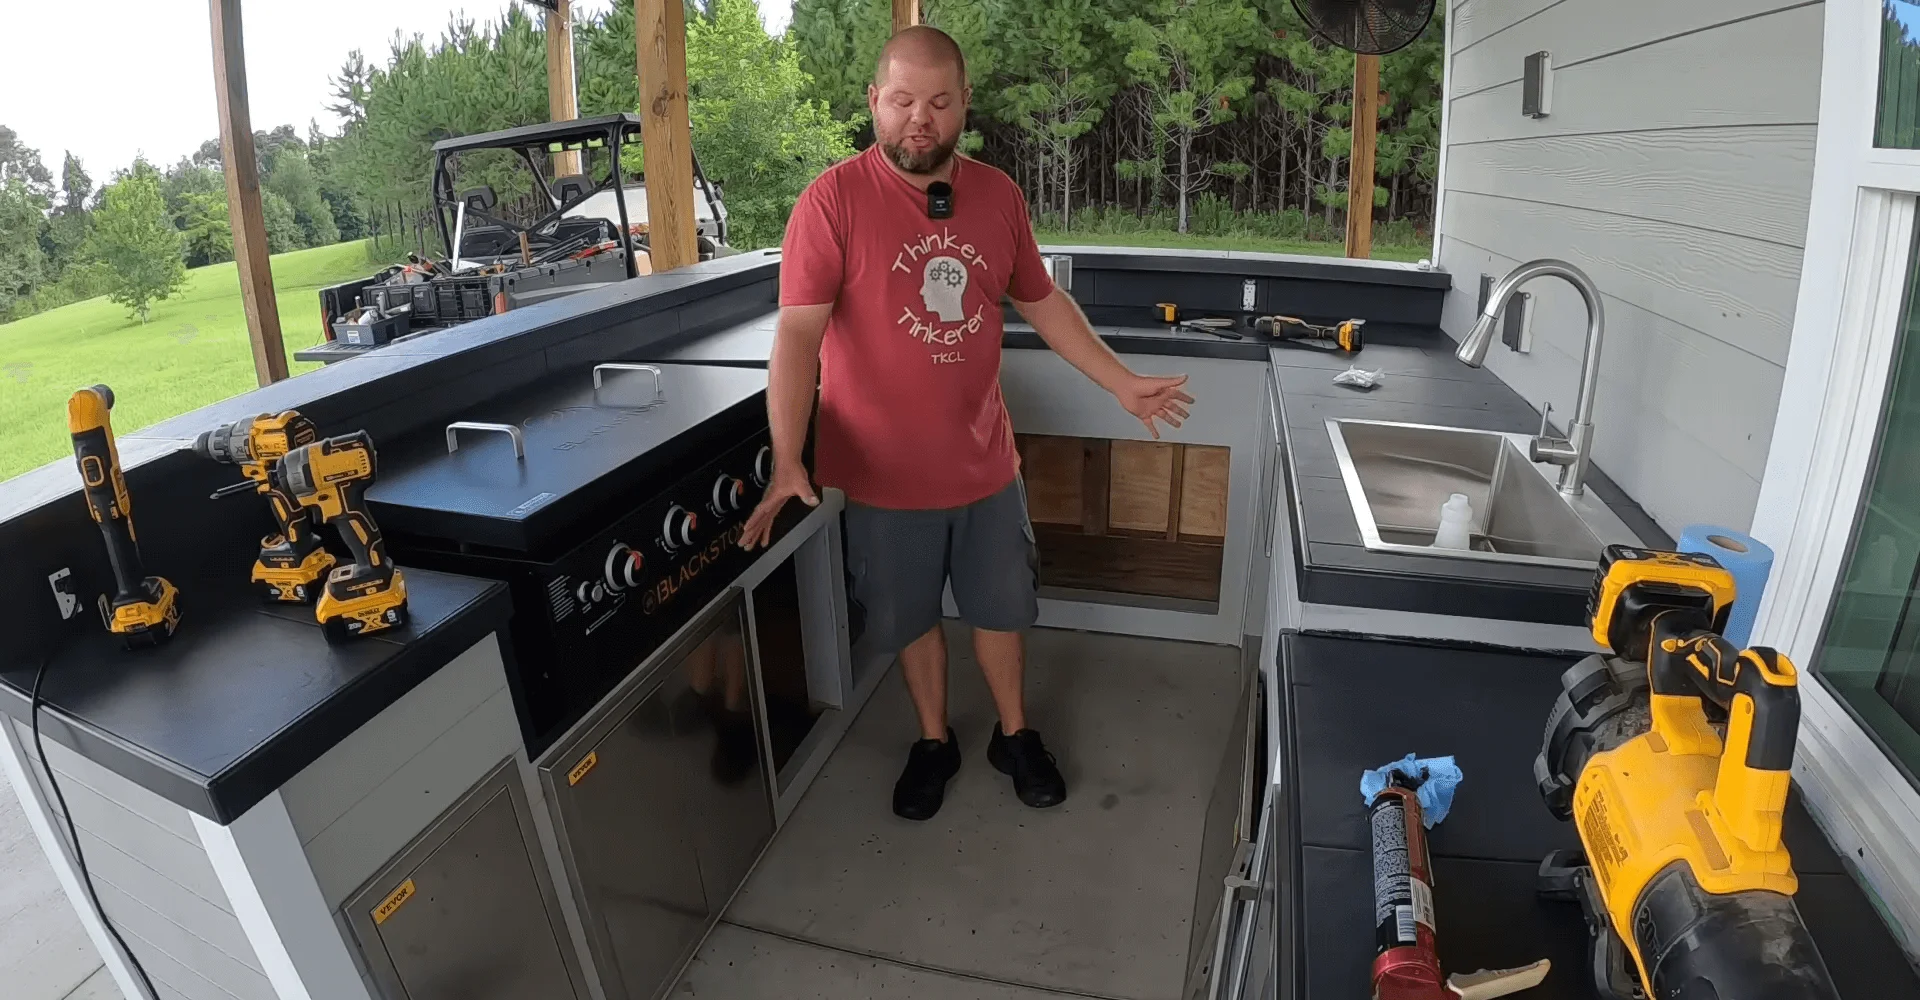
Adding storage units like drawers and cabinets will successfully complete your project. You can also add other additional elements like lighting, seating, or decorations if you like. Installing and completing your project with these outdoor appliances will enhance your culinary experience.
What Additional Things Do You Need for This Project?
Once you have established a sturdy framework for your do-it-yourself outdoor kitchen, the next step is to consider how you will include the many utilities required to turn it into a functional and full-fledged area. The following are some important utilities that need to be included in your build from the start:
Any outdoor kitchen would benefit from the installation of the VEVOR stainless steel BBQ Double Access Door since it is both long-lasting and practical. This double-door access is constructed from high-quality stainless steel, so it can survive exposure to the weather and make getting to the barbecue grill simple. Thanks to the minimalist layout and polished surface, your outdoor kitchen will have a fresher look.
The VEVOR outdoor kitchen island may be used in a variety of ways and will last for years. It has a frame and countertop made of stainless steel with an integrated sink and grill. You may keep all of your kitchen utensils and gadgets in the several drawers and cupboards of the island. VEVOR has designed a prefabricated outdoor kitchen island for your convenience and peace of mind. If you like outdoor entertaining and cooking, it is a worthwhile purchase.
Constructing a DIY outdoor kitchen that is affordable and fulfilling may be a lot of fun. VEVOR offers a diverse selection of goods that may be included in the construction of an outdoor kitchen. The storage options available in a kitchen are among the most important aspects, and VEVOR offers an outdoor kitchen drawer that is fabricated from high-quality stainless steel.
The material is resistant to rust and corrosion. The drawer has smooth sliding tracks and a secure locking mechanism, making it simple to retrieve the culinary tools, spices, and other necessities that it stores while also keeping them safe.
Outdoor Sink
When it comes to convenience and tidiness, having an outdoor sink that is properly installed could make all the difference. It enables you to keep from rushing inside the house to wash your hands, prepare dinner, or clean utensils. Consider purchasing a sink that is not only long-lasting but also resistant to the effects of the weather.
When it comes to generating ice in the great outdoors, the VEVO outdoor ice maker is a dependable and effective piece of equipment. In addition to being able to fit in tight quarters, it has the capacity to generate ice throughout the day without any issues.
You can easily alter the ice cube size using the straightforward control panel that is included with the ice maker. Additionally, you can switch the unit on and off at any time. It is also equipped with a practical drain stop, making it very easy to clean and maintain.
FAQs About DIY Outdoor Kitchen Build
Q: Why did you use plywood underneath the cement backer board?
In the DIY outdoor kitchen project, plywood is used beneath a cement backer board to give a strong and durable foundation. The dual-layer construction adds the necessary strength in heavy-loaded applications.
Plywood protects the project from shrinking and warping. The cement backer board provides a water-resistant surface, making the combination perfect for outdoor environments.
Q: Wouldn’t you have skipped the plywood step and saved time and money?
You may think of skipping the plywood step to save valuable time and money. However, we don’t recommend avoiding this step because plywood is a reliable and sturdy base for many structures. You may not get enough durability and stability without this step.
Avoiding this step could lead to affecting the project’s longevity and safety. So, you should better consider this step to eliminate the risk of potential repairs and rebuilds in the future.
Q: Aren’t there thin sets and mortars designed to be applied directly to plywood?
Yes, there are certain types of thin-set mortars that are formulated to bond directly with plywood. However, when conducting a DIY outdoor kitchen build, the use of a cement backer board over plywood is recommended because it provides superior moisture resistance and greater stability.
It is needed in outdoor settings, where temperature and humidity may fluctuate at any time. So if you don’t want anything to affect the longevity and durability of the build, consider using thin sets and mortars.
Q: What are the advantages of using cement board under tile?
Using a cement board under tile in a DIY outdoor kitchen project offers numerous advantages, including providing a firm and flat surface for the tiles, ensuring a smooth installation process, making the project moisture-resistant, preventing potential water damage, and withstanding temperature fluctuations in an outdoor setting.
Q: Why do you recommend doing a layout before starting the tile installation?
Doing a layout before starting tile installation in a DIY outdoor kitchen build helps you check out the final look and ensure the placement is symmetrical and perfect. It also helps to identify and resolve issues, like improper cuts, alignment issues, and many other things, to ensure a smooth and efficient installation process.
Q: How do you cut openings for outlets in the tile?
Cutting openings for outlets involves the right tools and precision. You should measure and mark the accurate location of the outlet on the tiles. Then, use a saw or a tile cutter to cut out the marked area. Don’t forget to wear safety goggles and gloves during the process to protect yourself from potential dust and debris.
Q: Can you put a thin set on the wall before installing the countertop?
Since the thin-set works as an adhesive for the countertop to bond with the wall and ensure stability and durability, you can apply it on the wall before installing the countertop. Make sure the wall surface is clean and dust-free before applying the thin set.
Final Words
Experimenting with a DIY kitchen outdoor project brings creativity and practical skills. The project will be successful and rewarding if you use reliable tools and materials from a well-known company.
In this context, VEVOR has proven to be a reliable company for DIY enthusiasts who are looking to embark on their DIY visions and desires without investing too much in the project. Hopefully, this article has enlightened you to create your DIY outdoor kitchen to refine your skills and improve your project.
All the products are functional options for you and add an aesthetic appeal to your surroundings. While the project may seem challenging at the beginning, you can make it significantly smoother with convenient products that support the endeavors of DIY enthusiasts.